Posts

Showing posts from 2012

More Prince Diamond stuff...

Image
So, in my previous post I mentioned that my fabric swatches got lost in the mail. I had originally ordered two colors of the same fabric.  White taffeta with White velvet flocking and Silver taffeta with White flocking... well, I never got those swatches... and when I contacted the company, they said they were out of the silver/white... I asked if there were going to get anymore of the silver/white, but they didn't answer... I also told them to go ahead and send me the white/white so I could at least see if that's what I wanted. By the way, the company is Big Z Fabrics or bigzfabric.com.    Well, today, I got the white/white... and here's some pictures. The first two are with flash... the last two without... and I photoed from different angles so you could see how it plays with the light. The fabric is nice, but kind of thin, so that's why there's a piece of paper behind it... otherwise it takes on a blue-gray tint from Gemmima.  I'll definitely have

Hair and Makeup and other stuff.

Image
So I've been hacking... I mean cutting on my wig for Prince Diamond... and it needs a little more work but it's starting to get there. This is really only my second wig that I've done... My first was my original wig for Uranus... but I didn't really like how that turned out and have since replaced that one. The key to wig cutting, I've learned, is cut little by little and try the wig on A WHOLE LOT.  Because even though I pin my wig to a male wig head, it still looks COMPLETELY different on me than it does on the mannequin.   But I worked on it just a little more since I took those pics and now I'm really liking it.   For those of you who are afraid to take on wigs... first off, read World of Wigcraft by Katie Bair .   It is AMAZING.  And once you get your mind to accept that there are very few mistakes that can't be fixed in wigcraft, you'll feel a lot more confident.   Say, for instance, that you cut the wig to short... is the wig ruined? 

Sally Deconstructed

Image
I made a lot of costumes before I started this blog, so I really have nothing about the processes I went through other than a few pictures I took.  So I've decided that I'd like to revisit some of my pre-blog works and talk a little more in depth about them...  And I wanted to start with Sally the Ragdoll because I was really pleased with how this one turned out.   When I approached this costume, I knew immediately that I DIDN'T want to do this. It's the Sally Sack Dress!!!  If you've ever seen the movie, you'd know that Sally has curves.   See?  There's a waist and hips and even boobs.  The costume above doesn't flatter at all.  And even when I've seen other Sallys?... Sallies?...  Salllai?... that were hand made, a lot of girls make a straight shift or a straight a-line dress and those don't really flatter their bodies, either. So... first I needed to find a flattering dress pattern BAM!  Simplicity 5189.  Look at View D

Pokemon: Pikachu

Image
Pokemon Pikachu  Completed 2008 Items Made: Ears, Tail.   The tail is made from soft faux fur and measures approx. 30 inches long.  It was made to hang although the fur is probably sturdy enough that the tail could be hooked to the wearer's back and it would remain upright.  The ears are are made from the same fur and filled with poly-fill.  They're really lightweight and attached to a no-slide headband.

Oklahoma: Saloon Girls

Image
Oklahoma! Saloon Girls Created March 2004 Items Made: One-piece bodysuit with detachable skirt. These costumes were built for my college's production of Oklahoma. Each girl is basically in a onesie made from red crushed velvet and purple glittered velvet.  Over that there is a very large circle skirt with lots and lots of of purple satin ruffles. I did not build the purple dress in the picture below.

Busy Busy Busy.

Image
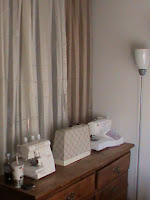
So, I've had the past couple of days off and I've been pretty productive.   First off, I cleaned, organized and rearranged my sewing corner... Here's the old layout.  I used to have the end of the den... I separated the area with some sheer curtains hung from the ceiling -- which kind of made a wall.  In front of the curtain wall was a dresser with my machines.  Next to that was a portable clothing rack... on the wall opposite the dresser was my work table... and then opposite the clothes rack and next to my table was a shelf of supplies... But I've been downsized and had to give up half of my end of the den... So here's the new layout. Not much changed now that I look at it...  I just shifted the dresser to the opposite side and moved my table... I also took the rolling rack apart and put it away... Also my dress form is in another room. Did I mention my sewing area was really messy and that moving all this first required thorough cleaning?  M

Hello, my name is Jason and I'm a t-shirt junkie...

Image
Yes, it's true... and would you believe I have more tees than this?  There's a box of Hard Rock tees and another box or two of other tees kicking around somewhere in my house.   Oh, and all of them have some kind of nostalgia or video game or anime or tv show on them... I also have about 12 pairs of jeans... all in various conditions from new-ish... to REALLY worn in. So yes, I'm a t-shirt junkie... and I'm also addicted to jeans... But it's okay, I'm going through my 12 step program... except it's maybe not 12... I'm not sure how many it will be... Step 1:  Admitting you have a problem.  check. Step 2: Deciding to take a course of action.  check. Step 3:   Actually, I'm going to drop this 12 step analogy.  haha! But I've decided to go through all of my jeans and t-shirts and inspect them... if the t-shirts are getting to worn, or getting holes or whatever, they're going into the t-shirt quilt pile... I figured this wou

Derp!

Image
So you know how I've been racking my brain trying to figure out a pattern for Diamond... Look what I had in my pattern library.  I don't know why I didn't think of it before. Butterick 6844.  It's a clergy robe, but with a little tailoring and a few modifications, I can make it look more like this... Here's what I have in mind so far... Probably gonna go with view A and possibly keep the button down front.   Extend the collar so it closes at center front. Omit the cuffs on the sleeves. On the back there are 3 pleats, which I'd draft out.  Remove the side pockets Shorten just below the low hip Add in side seam slits like in the second picture I also might add just a tiny bit of a sleeve cap, like in the pic above Add in a full lining since the pattern only has a partial lining. That sounds like a lot, but actually all of those things are pretty simple modifications. I also took advantage of EpicCosplay.com 's Black Friday Sa

The Nightmare Before Christmas: Sally the Ragdoll

Image
The Nightmare Before Christmas Sally the Ragdoll   Created March 2011   Items Made: Dress The silhouette of the dress is simple... just an a-line dress with flounce sleeves.  Most Sally costumes are straight a-lines which neglect her curvy figure so I chose a pattern with princess seams to not do that. What's really cool about this dress is that it was made entirely from scraps and remnants I had in my fabric stash. The rest of the dress was tricky.  I spent about 2 hours playing with fabrics on the mannequin to get the placements of each fabric to look good with each of the surrounding fabrics. Then each panel of the dress had to be assembled from the designated fabrics... Finally the panels were sewn together like normal.... it was kind of like making a quilt.  Although the chunk of Dark Blue/Light Blue stripe was really hard because it was two different fabrics that had to be pieced together and it wrapped around several of the panels.  But I absolutely

The Nightmare Before Christmas: Jack Skellington

Image
    T he Nightmare Before Christmas Jack Skellington Created October 2009   Items Made: Jacket, Trousers, Tie. A LOT went into the costume.  It was one that I've wanted to make forever but I could never find a fabric that I thought suitable... and I really didn't want to hand paint all of those pinstripes onto every piece of fabric.   Luckily I came across this awesome uneven pinstripe in Dark Charcoal from an online fabric store.  It was on clearance and I bought all they had... 11 yards. The base of the pattern came from a Burda pattern for a women's suit/tuxedo.  It took a lot of altering to change the shape from a normal woman's figure to a man trying to emulate that of a disproportionate skeleton puppet.  I also had to change the collar from a shawl collar to notched collar.  Also the tails took a bit of work to make look tattered but tailored all at the same time.  The tie uses stiff felt for the wings and the bat head brooch is made from S

Naruto: Sexy Jutsuu Naruto

Image
Naruto Sexy no Jutsuu Version Created November 2007   Items Made: Jacket, Trousers. This costume is a modified version of Naruto's traditional outfit. Since we were doing Naruto's female persona, the cosplayer wanted to make the design ultra feminine. So we went with a more modern, feminine cut trouser and loose cropped jacket. Both the trousers and the jacket are made from stretch corduroy in slightly muted/darker colors. The stretch allows the costume to be ultra comfy while the corduroy gives it a nice softness.  The collar was knitted on a knitting machine then sewn into the jacket.  The patches were painted with glitter fabric paint -- again adding a touch of femininity to the costume.  Lastly, I added a couple of decorative frog buttons on the trousers for a bit of whimsy -- plus the also tie in to Naruto's summoning ability.