Tutorial: Prince Diamond Brooch

Alright, so now that I’ve successfully finished 2 of these lovelies, I can share the step by step process with you. I made sure to take lots of pictures and write down everything I did as I made the first brooch, so that when I started making the second, it would look exactly the same. So here we go.
First the supplies... In no particular order... (by the way, this is the stuff I used, feel free to modify it as needed)

A. Acrylic crystal teardrop beads (you can use real crystal also, I just couldn’t find them)
B. Round glass seed beads in Gold
C. Scissors or Wire Cutters.
D. 2 3/4” Diamond -- This is a glass paperweight, but there are also acrylic versions used for wedding tablescapes.
E. 28 Gauge jewelry wire in gold -- This isn’t real gold wire because that’d kind of be a waste of money as the wire isn’t seen.
F. Pliers -- I just used needle nose pliers because I don’t have the kind for making jewelry.

First measure out a length of wire just a little smaller than the face of your stone. You're making a circle and want it to be small enough to prevent the diamond from passing through it... aka... falling out. Also add a few inches of wire to either end to make the next few steps easier.
Start adding your beads until you have enough to make your circle. For me it was 86 beads.

Next, thread one of your loose ends of wire through 5 or 6 of the beads on the opposite end of the wire. Pull the wires until almost all of the empty space is gone... you want to leave a tiny bit though -- about the space of 3 beads. Check your circle to your diamond once more to make sure it doesn't fall through.

Now coil the ends of the wire around the circle a few times and trim of the excess.

When it's done, the coiled wire blends right into the beads and you can't tell it's there. I've drawn arrows to point out the wire ends.

Here's my ring sitting on the face of my diamond. It's JUST small enough to keep the diamond in place but still shows as much of the face as possible.

Now cut 8 lengths of wire about 7"-8" long and fold them in half. You can use your pliers to get a good bend at the fold but don't crimp it closed.

Next you're going to link those wires around your ring -- spacing them evenly. Work the folded wires in between the beads of the ring. It'll look like a spider or the spokes of a wheel.

Then add a single bead over each set of wires. Both wires should be threaded through the bead.

Next, starting anywhere, take 1 wire from two adjacent wires and add 7 beads to each.

Then thread both wires through a single bead.

Slide the single bead all the way down. ( You can also pull on the wires and bend them to keep the beads tight. ) Next, take one of the free wires from the section you just worked and one wire from the spoke next to it and repeat the process.

Continue working your way around.
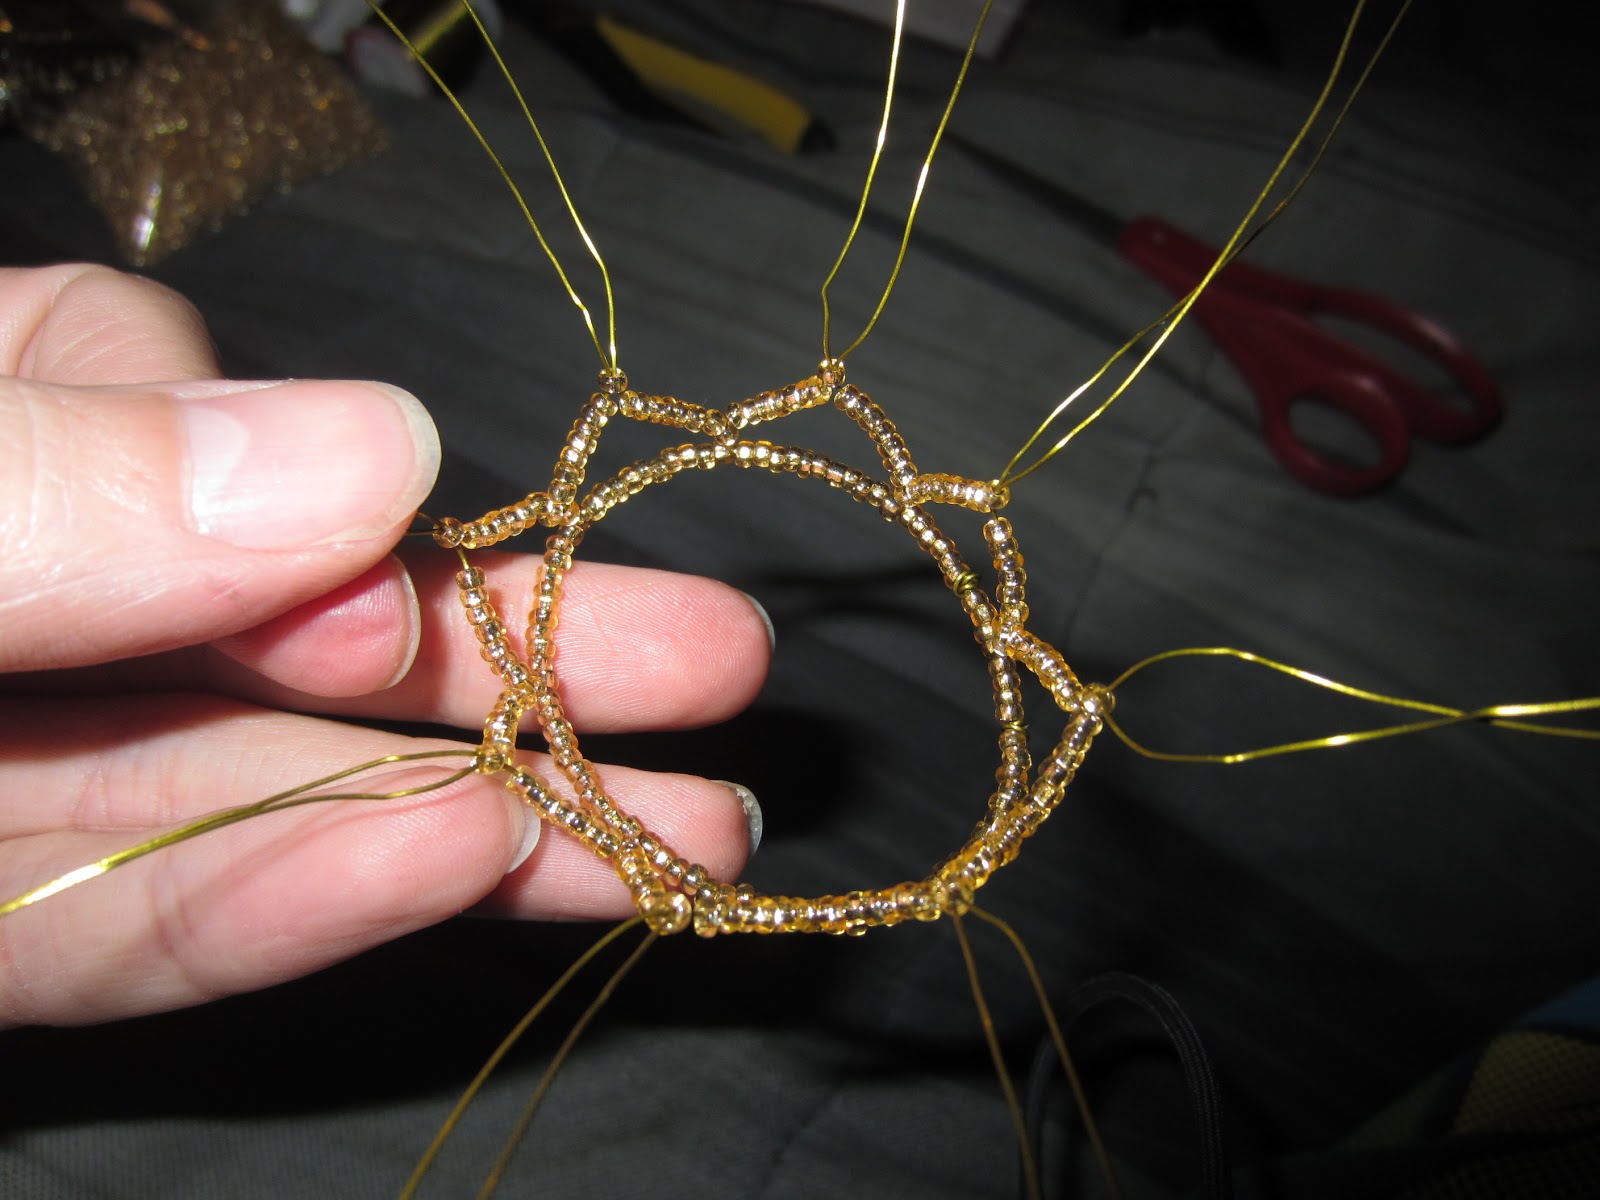
When you're done, you'll have what looks like a little flower, or a little crown.


Continue working your way around.

You'll also need to be careful to keep you left side wires on the left and the rights on the right. This will help when you're trying to tighten up the beads.

Now you'll need to set your diamond in and start your 3rd cycle. This one is 3 beads on each wire then join the wires.
Finally, your last cycle is 2 beads then join.

Once you've done that gather all of your wires and twist them together. You can use you're pliers to tighten the twist but be careful not to go crazy -- you might break the wire or the beads.


Coil around and shape what's left to where it wasn't sharp or scratchy or pokey -- you may need to trim off more of the twisted wires.

Lastly, grab a length of wire and thread it through your drop crystal.

I folded the wire and thread it through a few more beads.

Then just wrap the wire around one of the "spokes" a few times and trim away the excess.
There you have it. Really cool brooches made with crazy big diamonds and lots of pretty beads. To attach these I'm planning to sew these on to the garment itself. I believe the wire will be strong enough to hold the diamond in place. It'll also give me something to sew the thread around.


Comments
Post a Comment